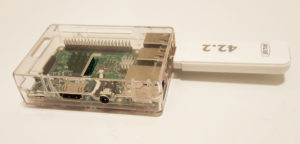
In this article we will explain how to configure and use our Raspberry Pi 3 to act as a 3G/4G Wi-Fi Router
Installing the required packages
First of all we need to install the DHCP Server, hostapd (for create a Wi-Fi AP) and usb-modeswitch (for the 3G/4G modem).
sudo apt-get install usb-modeswitch usb-modeswitch-data hostapd isc-dhcp-server
Configure DHCP Server
We proceed now to configure the DHCP Server in order to release IPs to our clients through Wi-Fi (wlan0).
Let’s start by configuring the DHCP subnet, IP range and DNS Server to push to the clients
/etc/dhcp/dhcpd.conf
#
# Configuration file for ISC dhcpd for Debian
#
#
# The ddns-updates-style parameter controls whether or not the server will
# attempt to do a DNS update when a lease is confirmed. We default to the
# behavior of the version 2 packages ('none', since DHCP v2 didn't
# have support for DDNS.)
ddns-update-style none;

default-lease-time 600;
max-lease-time 7200;

# If this DHCP server is the official DHCP server for the local
# network, the authoritative directive should be uncommented.
authoritative;

# Use this to send dhcp log messages to a different log file (you also
# have to hack syslog.conf to complete the redirection).
log-facility local7;

# Internal subnet.
subnet 10.5.5.0
netmask 255.255.255.0 {
  range 10.5.5.26 10.5.5.50;
  option domain-name-servers 8.8.8.8, 8.8.4.4;
  option domain-name "local-network";
  option routers 10.5.5.1;
  option broadcast-address 10.5.5.255;
  default-lease-time 600;
  max-lease-time 7200;
}
After configuring the DHCP subnet we should specify on which interface/interfaces the DHCP Server should listen, for doing this we edit the following file and insert the interface in the “INTERFACES” section:
/etc/default/isc-dhcp-server
# Defaults for isc-dhcp-server initscript
# sourced by /etc/init.d/isc-dhcp-server
# installed at /etc/default/isc-dhcp-server by the maintainer scripts
#
# This is a POSIX shell fragment
#

# Path to dhcpd's config file (default: /etc/dhcp/dhcpd.conf).
#DHCPD_CONF=/etc/dhcp/dhcpd.conf

# Path to dhcpd's PID file (default: /var/run/dhcpd.pid).
#DHCPD_PID=/var/run/dhcpd.pid

# Additional options to start dhcpd with.
#       Don't use options -cf or -pf here; use DHCPD_CONF/ DHCPD_PID instead
#OPTIONS=""

# On what interfaces should the DHCP server (dhcpd) serve DHCP requests?
#       Separate multiple interfaces with spaces, e.g. "eth0 eth1".
INTERFACES="wlan0"
Configure Wi-Fi AP
We configure now hostapd in order to setup a Wi-Fi network for the clients like Smartphone, Laptop, Tablets, etc..
If doesn’t already exist create a file under “/etc/hostapd/hostapd.conf”
touch /etc/hostapd/hostapd.conf
Then inside the file put the following configuration and change the field ssid (replace <your-ssid-here>) and wpa_passphrase (replace <password-here>) with a Wi-Fi name to show to your devices and the password for access to the Wi-Fi
### Wireless network interface ###
interface=wlan0

### Driver ###
driver=nl80211

### Network name SSID ###

ssid=<your-ssid-here>

### Set frequency to 2.4 Ghz ###
hw_mode=g

### Channel number ###
channel=4

### Enable Wi-Fi N ###
ieee80211n=1

### Enable WMM ###
wmm_enabled=1

### Enable 40 Mhz channels ###
ht_capab=[HT40][SHORT-GI-20][DSSS_CCK-40]

### Allow all MAC Address ###
macaddr_acl=0

### Use WPA Auth ###
auth_algs=1

### Require clients to know the network name ###
ignore_broadcast_ssid=0

### Use WPA2 ###
wpa=2

### Enable Pre-Shared Key ###
wpa_key_mgmt=WPA-PSK

### Network key ###
wpa_passphrase=<password-here>

### Use AES ###
rsn_pairwise=CCMP
Now we should tell to the which configuration file the init script should use, in order to do this we need to edit the file “/etc/default/hostapd” and comment out the parameter “DAEMON_CONF=” and fill it with the path to the previously created hostapd configuration file. At the end the file should be like that:
# Defaults for hostapd initscript
#
# See /usr/share/doc/hostapd/README.Debian for information about alternative
# methods of managing hostapd.
#
# Uncomment and set DAEMON_CONF to the absolute path of a hostapd configuration
# file and hostapd will be started during system boot. An example configuration
# file can be found at /usr/share/doc/hostapd/examples/hostapd.conf.gz
#
DAEMON_CONF="/etc/hostapd/hostapd.conf"

# Additional daemon options to be appended to hostapd command:-
# -d show more debug messages (-dd for even more)
# -K include key data in debug messages
# -t include timestamps in some debug messages
#
# Note that -B (daemon mode) and -P (pidfile) options are automatically
# configured by the init.d script and must not be added to DAEMON_OPTS.
#
#DAEMON_OPTS=""
Configure the network interface and Firewall (iptables) rules
We configure now the interface wlan0 in the file “/etc/network/interfaces” in order to disable the automatic configuration through wpa_supplicant and assign a static IP to the wlan0 interface and make it as a default gateway for the clients.
Comment the section “iface wlan0 inet manual” and “wpa-conf /etc/wpa_supplicant/wpa_supplicant.conf”.
# interfaces(5) file used by ifup(8) and ifdown(8)
# Please note that this file is written to be used with dhcpcd
# For static IP, consult /etc/dhcpcd.conf and 'man dhcpcd.conf'

# Include files from /etc/network/interfaces.d:
source-directory /etc/network/interfaces.d

auto lo
iface lo inet loopback

iface eth0 inet manual

allow-hotplug wlan0

#iface wlan0 inet manual
# wpa-conf /etc/wpa_supplicant/wpa_supplicant.conf

iface wlan0 inet static
  address 10.5.5.1
  netmask 255.255.255.0
  network 10.5.5.0
  broadcast 10.5.5.255

allow-hotplug wlan1

iface wlan1 inet manual
  wpa-conf /etc/wpa_supplicant/wpa_supplicant.conf
We need now to setup our Raspberry Pi as a “Router” so we should now enable the packets forwarding into the kernel with:
sudo echo 1 > /proc/sys/net/ipv4/ip_forward
But this will only enable temporary the packet forwarding so in order to make it permanent we should edit the file “/etc/sysctl.conf” and add (or comment out if exist)
# Uncomment the next line to enable packet forwarding for IPv4
net.ipv4.ip_forward=1
The configuration is almost finished, we need only to setup the iptables rules
iptables -t nat -A POSTROUTING -o usb0 -j MASQUERADE
iptables -A FORWARD -i usb0 -o wlan0 -m state --state RELATED,ESTABLISHED -j ACCEPT
iptables -A FORWARD -i wlan0 -o usb0 -m state --state NEW,RELATED,ESTABLISHED -j ACCEPT
iptables -A FORWARD -j DROP
Save the current iptables rule with
iptables-save > /etc/iptables.ipv4.nat
We configure the rule to be loaded at boot by edit the file “/etc/rc.local” and add at the end of the file (before the “exit 0) the following lines:
iptables-restore < /etc/iptables.ipv4.nat
Why “usb0” interface in the iptables rules?
Probably you are asking why I’ve chosen the usb0 interface in the iptables rules instead of ppp0. I’ve chosen usb0 because my 3G key (a ZTE MF730) is switched by the usb-modeswitch project as an USB Ethernet interface (this happens also for some Huawei 3G/4G key).
Starting the services
The configuration now is ended so let’s start the services!
First of all restart the networking in order to apply the modification
root@raspberrypi:~# /etc/init.d/networking restart
Then start or restart if running the DHCP Server service
root@raspberrypi:~# /etc/init.d/isc-dhcp-server restart
Start hostapd
root@raspberrypi:~# /etc/init.d/hostapd restart
We are done! Now you should see your Wi-FI Network and able to connect to it. You can also use now use multiple devices through your 3G/4G USB key.
hello !
Thank you for your article !
But i have a question :
I have not 3G/4G USB key … Can i use a smartphone ?
It is on usb0 and it is on modem mode !
ifcongig:
usb0 Link encap:Ethernet HWaddr 02:55:35:3b:3b:38
inet addr:192.168.42.167 Bcast:192.168.42.255 Mask:255.255.255.0
inet6 addr: fe80::7f43:9856:9c9a:e338/64 Scope:Link
UP BROADCAST RUNNING MULTICAST MTU:1500 Metric:1
RX packets:12 errors:0 dropped:0 overruns:0 frame:0
TX packets:39 errors:0 dropped:0 overruns:0 carrier:0
collisions:0 txqueuelen:1000
RX bytes:1531 (1.4 KiB) TX bytes:9060 (8.8 KiB)
wlan0 Link encap:Ethernet HWaddr 84:16:f9:0b:71:46
inet addr:192.168.10.1 Bcast:192.168.10.255 Mask:255.255.255.0
inet6 addr: fe80::848c:b2ea:6147:fa42/64 Scope:Link
UP BROADCAST RUNNING MULTICAST MTU:1500 Metric:1
RX packets:1513 errors:0 dropped:96 overruns:0 frame:0
TX packets:1353 errors:0 dropped:241 overruns:0 carrier:0
collisions:0 txqueuelen:1000
RX bytes:379567 (370.6 KiB) TX bytes:1565778 (1.4 MiB)
lsusb
Bus 001 Device 007: ID 04e8:6864 Samsung Electronics Co., Ltd
lsusb
Hi M@rco,
sorry for the late reply! I have lost the email notification that someone have commented.. Yes you can also use the Smartphone, I never test it but if the Smartphone it’s in modem mode and recognised as a network interface it will work 🙂
Nice post!! Can you comment a bit more aboute the iptables rules?
Thanks!
Hi denadai,
Thank you!
yes, I can comment a bit more! What do you want to know or what is not clear? 🙂
Daniele
I’m new to iptables. If you could comment what specific these rules do? I’ve found other command, that you could update the post later: sudo iptables -t nat -A PREROUTING -p tcp –dport 2525 -j DNAT –to-destination 192.168.1.1:80. It will give you access to modem trougth this bridge.
And, thanks you for this great job!
Sure! I’ll do here a short explanation of the rules and when I have time I will update the post
# This rule will NAT all the traffic that exit from the Modem interface (usb0) with the modem IP
iptables -A POSTROUTING -o usb0 -j MASQUERADE
# This rule will allow all new and already established connections from the Wi-Fi clients to Internet
iptables -A FORWARD -i wlan0 -o usb0 -m state –state NEW,RELATED,ESTABLISHED -j ACCEPT
# This rule will accept all the reply that come back from internet to the Wi-Fi clients (as you can see there is not the flag NEW)
iptables -A FORWARD -i usb0 -o wlan0 -m state –state RELATED,ESTABLISHED -j ACCEPT
I get stuck at “sudo iptables -A POSTROUTING -o usb0 -j MASQUERADE”
I get the following message “iptables: No chain / target / match by that name.”
my ifconfig indicates that wwan0 is the “Bus 001 Device 007: ID 148f: 760b Ralink Technology, Corp. MT7601U Wireless Adapter”.
I tried to make usb0, wwan0 but get the same error message.
Please your help, thanks in advance
sorry in ifconfig is see wwan0 and it is: Bus 001 Device 009: ID 12d1:14cb Huawei Technologies Co., Ltd.
i dont see a usb0 in the list
Your modem have the interface name called “wwan0” instead of “usb0” so the iptables rule would be:
“sudo iptables -t nat -A POSTROUTING -o wwan0 -j MASQUERADE”
hello dark-vex,
see in my first log: ” I tried to make usb0, wwan0 but get the same error message.”
so if i type in “sudo iptables -t nat -A POSTROUTING -o wwan0 -j MASQUERADE”
still i get: “iptables: No chain / target / match by that name.”
any suggestion?
In the post there was missing the parameter “-t nat” and I have fixed it. So “sudo iptables -t nat -A POSTROUTING -o wwan0 -j MASQUERADE” should work.. in case you still receive “No chain / target / match by that name” please paste the output of “sudo iptables -t nat -nvL”
Hi, i want to create a 4G raspberry pi router but only with 2 lan ports and 4g module only for remote accessing from everywhere. Can you help me how can i do that?
Hi Peter, the additional ethernet port for the raspberry it’s and usb ethernet card or it’s a shield over the raspberry?
Hi, thanks for your tutorial. How can I make these changes permanent on every startup? I would change the setup slightly because I want to share 4g connection over ethernet port, it is near the same.
BR
You can place them under /etc/rc.local