Intro
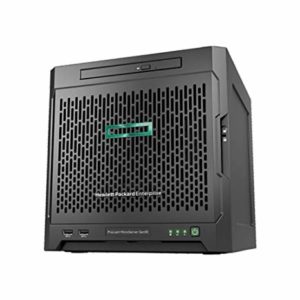
In my house I have an HP Microserver Gen 10, I use it as NAS and hypervisor for a few virtual machines.
Since I need a reliable system I have decided to implement a RAID 1 (2x 3TB HDD) and use an external 3TB for backups.
Yes, if you where asking why backups, the answer is pretty simple, RAID doesn’t substitute backups.
I had three option:
- Microserver RAID (Marvell SATA controller 88SE9230)
- Linux software RAID
- Add an additional PCI Express RAID card
Why I have chosen the third option?
I have decided to use an additional RAID card because for the Marvell SATA controller RAID I have see a lot of discussion about weird issues (ex: RAID no more recognized after a poweroff and power on).
Plus I have tested it and it didn’t recognized a failure on one of the HDD and the Marvell Utility on Linux is a crap so I have discarded it.
I have also discarded Linux software RAID for performance issue, sometimes it use a lot of I/O.
On the Microserver there are only two core (It’s an AMD Opteron X3216 APU) so the server will became busy only for handle read/write operations.
So in the end I have chosen a Dell PERC H200 RAID card (it’s an LSI 9240-8i PCI SAS/SATA) because it’s a good and also cheapest RAID on the market.
Plus it works (only in BIOS mode) and fit perfectly on the Microserver (only the connector for the discs is not easy to fit).
By taking a look on various forums (in particular this on homeservershow.com) they suggest the LSI 92XX series.
Firmware upgrade
Now let’s stop talking and let’s start with the facts.
The PERC H200 card that I’ve bought come with a very old firmware version (2010 I think it’s the first release) and it doesn’t support HDD major than 2 TB, only the recent firmware will support them.
On the web there are lot of tutorial for convert this card from Dell brand to original LSI firmware. (LSI9211-IT or LSI9211-IR here an explaination about the two modes)
Since Dell provide an official firmware we are gonna use it.
Step 1 – Get the firmware
Go on the Dell website and downlod the Linux version of the firmware for the PERC H200 (https://www.dell.com/support/home/it/it/itdhs1/drivers/driversdetails?driverid=nx9t4).
[root@microvisor ~]# wget https://downloads.dell.com/FOLDER00417454M/1/SAS-RAID_Firmware_NX9T4_LN32_07.03.05.00_A08.BIN
Since we are running on HP hardware and not on Dell hardware if you run the binary you will receive the following error:
This Update Package is not compatible with your system configuration
So we need to extract the content from the file, in order to do it, run the following command:
[root@microvisor ~]# bash SAS-RAID_Firmware_NX9T4_LN32_07.03.05.00_A08.BIN --extract SAS
The extracted content it will look like this:
[root@microvisor ~]# ll SAS
total 5680
-rwxr-xr-t. 1 root root     360 Feb  3  2012 00-secupd-dell.rules
-rwxr-xr-t. 1 root root      52 Feb  3  2012 98-secupdusb.rules
-rwxr-xr-t. 1 root root     227 Jan 12  2012 buildVer.sh
-rwxr-xr-t. 1 root root     302 Feb  3  2012 doRPM.sh
-rwxr-xr-t. 1 root root   22173 Feb  3  2012 dupdisneyinstall.sh
-rwxr-xr-t. 1 root root  101425 Jan 25  2012 duppmdatacollector.bin
-rwxr-xr-t. 1 root root   22781 Jan 12  2012 en.prop
drwxr-xr-t. 2 root root      78 Apr 12  2012 ESX
-rwxr-xr-t. 1 root root 1205544 Jan 12  2012 getSystemId
drwxr-xr-t. 3 root root      35 Apr 12  2012 hapi
-rwxr-xr-t. 1 root root  327836 Feb  3  2012 libstorelibir-2.so
-rwxr-xr-t. 1 root root  282444 Feb  3  2012 libstorelibir.so
-rwxr-xr-t. 1 root root  181848 Feb  3  2012 libstorelib.so
-rwxr-xr-t. 1 root root   75708 Jan 12  2012 mc.txt
-rwxr-xr-t. 1 root root    6718 Apr 12  2012 package.xml
drwxr-xr-t. 2 root root      60 Aug 13 17:45 payload
-rwxr-xr-t. 1 root root     390 Apr 12  2012 PIEConfig.sh
-rwxr-xr-t. 1 root root    4461 Feb  3  2012 PIEInfo.txt
-rwxr-xr-t. 1 root root 2465586 Feb  3  2012 sasdupie
-rwxr-xr-t. 1 root root     374 Jul  7  2006 smbiosHelp.txt
-rwxr-xr-t. 1 root root     638 Jul  7  2006 spconfig.xml
-rwxr-xr-t. 1 root root     893 Mar 17  2010 sphelp.txt
-rwxr-xr-t. 1 root root   58863 Jan 23  2012 spsetup.sh
-rwxr-xr-t. 1 root root  934020 Jan 12  2012 sputility.bin
-rwxr-xr-t. 1 root root     537 Jul  7  2006 spUtilityHelp.txt
-rwxr-xr-t. 1 root root   41230 Feb  3  2012 srvadmin-storelib-sysfs-7.0.0-4.73.1.el4.i386.rpm
-rwxr-xr-t. 1 root root    1419 Feb 24  2007 svmExeMsg.xsl
-rwxr-xr-t. 1 root root       4 Jul  7  2006 uni-eol.txt
-rwxr-xr-t. 1 root root    4818 Apr 12  2012 Version.txt
[root@microvisor ~]#
We don’t need all those files but only the content of the payload folder, so create a new folder and copy the files
[root@microvisor ~]# mkdir -p ~/firmware-upgrade/
[root@microvisor ~]# cp -rf ~/SAS/payload/* ~/firmware-upgrade/
Step 2 – Get the flash utility for Linux
For flash the firmware LSI provide a tool called sas2flash.
Since we are gonna flash the original Dell firmware we can flash directly from Linux OS (Centos 7 in my case) without creating a bootable MSDOS USB Stick.
I have downloaded the sas2flash utility for linux from this link let’s download and extract the content from the zip
[root@microvisor ~]# wget https://ww2.chemistry.gatech.edu/software/lsi/9211-8i/Installer_P12_for_Linux.zip
[root@microvisor ~]# unzip Installer_P12_for_Linux.zip
Now copy the sas2flash tool for i686 and x64 systems to our firmware-upgrade folder
[root@microvisor ~]# cp ~/Installer_P12_for_Linux/sas2flash_linux_i686_x86-64_rel/sas2flash ~/firmware-upgrade/
Step 3 – Flash the firmware
Now we are ready to flash the RAID card, go inside the firmware-upgrade folder and run this command in order to list all available LSI RAID controller on the system
[root@microvisor firmware-upgrade]# ./sas2flash -listall
LSI Corporation SAS2 Flash Utility
Version 12.00.00.00 (2011.11.08)
Copyright (c) 2008-2011 LSI Corporation. All rights reserved

Adapter Selected is a LSI SAS: SAS2008(B2)

Num Ctlr FW Ver NVDATA x86-BIOS PCI Addr
----------------------------------------------------------------------------

0 SAS2008(B2) 07.15.08.00 07.00.00.19 07.11.10.00 00:03:00:00

Finished Processing Commands Successfully.
Exiting SAS2Flash.
As you can see the tool detect our card as number 0, let’s print out the detail of this card
[root@microvisor firmware-upgrade]# ./sas2flash -c 0 -list
LSI Corporation SAS2 Flash Utility
Version 12.00.00.00 (2011.11.08)
Copyright (c) 2008-2011 LSI Corporation. All rights reserved

Adapter Selected is a LSI SAS: SAS2008(B2)

Controller Number : 0
Controller : SAS2008(B2)
PCI Address : 00:03:00:00
SAS Address : 5782bcb-0-5480-5300
NVDATA Version (Default) : 07.00.00.19
NVDATA Version (Persistent) : 07.00.00.19
Firmware Product ID : 0x2713
Firmware Version : 07.15.08.00
NVDATA Vendor : Dell
NVDATA Product ID : H200A
BIOS Version : 07.11.10.00
UEFI BSD Version : 07.00.01.00
FCODE Version : N/A
Board Name : PERC H200A
Board Assembly : N/A
Board Tracer Number : N/A

Finished Processing Commands Successfully.
Exiting SAS2Flash.
In my case the output is alredy after a firmware flash but before do the flash note down the following data: NVDATA, Firmware Version and BIOS Version.
Run now the following command for start the firmware flash. We flash the firmware (-f parameter and the boot rom – b parameter):
Flash command
[root@microvisor firmware-upgrade]# ./sas2flash -o -f H200A.FW -b mptsas2.rom
LSI Corporation SAS2 Flash Utility
Version 12.00.00.00 (2011.11.08)
Copyright (c) 2008-2011 LSI Corporation. All rights reserved

Advanced Mode Set

Adapter Selected is a LSI SAS: SAS2008(B2)

Executing Operation: Flash Firmware Image

Firmware Image has a Valid Checksum.

Firmware Image compatible with Controller.

Valid NVDATA Image found.

NVDATA Device ID and Chip Revision match verified.
NVDATA Versions Compatible.
Valid Initialization Image verified.
Valid BootLoader Image verified.

Beginning Firmware Download...
Firmware Download Successful.

Verifying Download...

Firmware Flash Successful.

Resetting Adapter...
Adapter Successfully Reset.

Executing Operation: Flash BIOS Image

Validating BIOS Image...

BIOS Header Signature is Valid

BIOS Image has a Valid Checksum.

BIOS PCI Structure Signature Valid.

BIOS Image Compatible with the SAS Controller.

Attempting to Flash BIOS Image...

Verifying Download...

Flash BIOS Image Successful.

Updated BIOS Version in BIOS Page 3.

Finished Processing Commands Successfully.
Exiting SAS2Flash.
That’s it! If the flash gone ok you can reboot the system and enjoy the new firmware for disks > 2TB
Step 4 – RAID tools and smartctl (optional)
For this RAID card you cannot use MegaRAID tools. You need for the Fusion-MPT SAS-2 cards a tool called sas2ircu.
This tool on Centos 7 is provided by nux.ro you can download and install it with these commands:
[root@microvisor ~]# wget http://li.nux.ro/download/nux/dextop/el7/x86_64/sas2ircu-15.0-1.el7.nux.x86_64.rpm
[root@microvisor ~]# yum install sas2ircu-15.0-1.el7.nux.x86_64.rpm
Now you can check the RAID status with this command:
View RAID Status
[root@microvisor ~]# sas2ircu 0 DISPLAY
LSI Corporation SAS2 IR Configuration Utility.
Version 15.00.00.00 (2012.11.08)
Copyright (c) 2009-2012 LSI Corporation. All rights reserved.

Read configuration has been initiated for controller 0
------------------------------------------------------------------------
Controller information
------------------------------------------------------------------------
  Controller type                         : SAS2008
  BIOS version                            : 7.11.10.00
  Firmware version                        : 7.15.08.00
  Channel description                     : 1 Serial Attached SCSI
  Initiator ID                            : 0
  Maximum physical devices                : 39
  Concurrent commands supported           : 2607
  Slot                                    : 1
  Segment                                 : 0
  Bus                                     : 3
  Device                                  : 0
  Function                                : 0
  RAID Support                            : Yes
------------------------------------------------------------------------
IR Volume information
------------------------------------------------------------------------
IR volume 1
  Volume ID                               : 79
  Status of volume                        : Okay (OKY)
  Volume wwid                             : 0926a6d5d71ba999
  RAID level                              : RAID1
  Size (in MB)                            : 2861056
  Physical hard disks                     :
  PHY[0] Enclosure#/Slot#                 : 1:0
  PHY[1] Enclosure#/Slot#                 : 1:1
------------------------------------------------------------------------
Physical device information
------------------------------------------------------------------------
Initiator at ID #0

Device is a Hard disk
  Enclosure #                             : 1
  Slot #                                  : 0
  SAS Address                             : 4433221-1-0700-0000
  State                                   : Optimal (OPT)
  Size (in MB)/(in sectors)               : 2861588/5860533167
  Manufacturer                            : ATA
  Model Number                            : WDC WD30EFRX-68N
  Firmware Revision                       : 0A82
  Serial No                               : WDW
  GUID                                    : 50014ee2ba25624c
  Protocol                                : SATA
  Drive Type                              : SATA_HDD

Device is a Hard disk
  Enclosure #                             : 1
  Slot #                                  : 1
  SAS Address                             : 4433221-1-0600-0000
  State                                   : Optimal (OPT)
  Size (in MB)/(in sectors)               : 2861588/5860533167
  Manufacturer                            : ATA
  Model Number                            : WDC WD30EFRX-68N
  Firmware Revision                       : 0A82
  Serial No                               : WDW
  GUID                                    : 50014ee264d045a4
  Protocol                                : SATA
  Drive Type                              : SATA_HDD

Device is a Hard disk
  Enclosure #                             : 1
  Slot #                                  : 2
  SAS Address                             : 4433221-1-0500-0000
  State                                   : Ready (RDY)
  Size (in MB)/(in sectors)               : 2861588/5860533167
  Manufacturer                            : ATA
  Model Number                            : WDC WD30EFRX-68E
  Firmware Revision                       : 0A82
  Serial No                               : WDW
  GUID                                    : 50014ee2bb84764b
  Protocol                                : SATA
  Drive Type                              : SATA_HDD

Device is a Hard disk
  Enclosure #                             : 1
  Slot #                                  : 3
  SAS Address                             : 4433221-1-0400-0000
  State                                   : Ready (RDY)
  Size (in MB)/(in sectors)               : 2861588/5860533167
  Manufacturer                            : ATA
  Model Number                            : WDC WD30EFRX-68E
  Firmware Revision                       : 0A82
  Serial No                               : WDW
  GUID                                    : 50014ee20fc049ff
  Protocol                                : SATA
  Drive Type                              : SATA_HDD
------------------------------------------------------------------------
Enclosure information
------------------------------------------------------------------------
  Enclosure#                              : 1
  Logical ID                              : 5782bcb0:54805300
  Numslots                                : 8
  StartSlot                               : 0
------------------------------------------------------------------------
SAS2IRCU: Command DISPLAY Completed Successfully.
SAS2IRCU: Utility Completed Successfully.
[root@microvisor ~]#
If you need or need to run smartmontools on each disk normally you cannot with a RAID card but there is a trick.
You just need only to load the sg kernel module (Linux SCSI Generic driver) and then you where able to use smartctl.
[root@microvisor ~]# modprobe sg
[root@microvisor ~]# smartctl -a /dev/sg2
smartctl 6.5 2016-05-07 r4318 [x86_64-linux-3.10.0-957.27.2.el7.x86_64] (local build)
Copyright (C) 2002-16, Bruce Allen, Christian Franke, www.smartmontools.org

=== START OF INFORMATION SECTION ===
Model Family:     Western Digital Red
Device Model:     WDC WD30EFRX-68N32N0
Serial Number:    WD-WCC
LU WWN Device Id: 5 0014ee 2ba25624c
Firmware Version: 82.00A82
User Capacity:    3,000,592,982,016 bytes [3.00 TB]
Sector Sizes:     512 bytes logical, 4096 bytes physical
Rotation Rate:    5400 rpm
Form Factor:      3.5 inches
Device is:        In smartctl database [for details use: -P show]
ATA Version is:   ACS-3 T13/2161-D revision 5
SATA Version is:  SATA 3.1, 6.0 Gb/s (current: 6.0 Gb/s)
Local Time is:    Wed Aug 14 15:31:56 2019 CEST
SMART support is: Available - device has SMART capability.
SMART support is: Enabled
To always load the module at boot you need to create a file under /etc/modules-load.d/ folder for ex. raid-smart.conf and inside the file write sg
[root@microvisor ~]# echo "sg" > /etc/modules-load.d/raid-smart.conf
If you need help, please leave a comment!