Sometime I have the necessity to install a Centos 7 system with the Desktop.
A lot of times happened that I have only the CentOS 7 minimal ISO image available on my PC.
Instead of downloading the Desktop ISO I wants to show you how to proceed with the minimal ISO installation and then install the desktop with yum.
After the system is up and running with the minimal installation, login into SSH to the system with your username (in this case “user”) or login with root user
I gonna install Gnome Desktop with yum (-y will reply automatically ‘yes’ to yum)
yum groupinstall 'GNOME Desktop' -y
I want also to automatically start the desktop manager when I power on the system. To set default target in systemctl to ‘graphical.target’ and I can do that with:
I bought a new set of disk for my HP Microserver Gen10, 2x 10Tb WD HDD, after setting them in RAID 1, I had the necessity migrate the currently running Virtual Machines without creating downtimes, loosing data and of course not waste much time to perform this migration.
Lucky for me I have setup the Microserver Gen10 with LVM this will simplify a lot the procedure that I gonna explain to you below.
First of all I have initialized the physical volume with the command:
pvcreate /dev/sdc
After this I have extended my logical volume called “vms” with vgexent command:
vgextend vms /dev/sdc
After that I started the migration of all Logical Volume from physical volume /dev/sdb to the new physical volume /dev/sdc:
pvmove -b /dev/sdb /dev/sdc
I started then to monitor the progress of the migration with:
progress lvs -a -o+devices
When migration finished I removed the disk from the volume group and then removed the LVM signature from the disk:
vgreduce vms /dev/sdb
pvremove /dev/sdb
That’s it! Now you can remove the HDD/HDDs from the system, hope this guide have helped you.
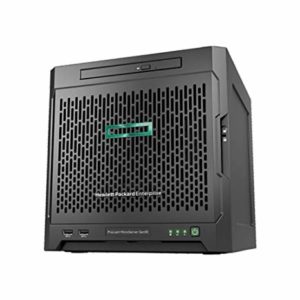
In my house I have an HP Microserver Gen 10, I use it as NAS and hypervisor for a few virtual machines.
Since I need a reliable system I have decided to implement a RAID 1 (2x 3TB HDD) and use an external 3TB for backups.
Yes, if you where asking why backups, the answer is pretty simple, RAID doesn’t substitute backups.
I had three option:
Microserver RAID (Marvell SATA controller 88SE9230)
Linux software RAID
Add an additional PCI Express RAID card
Why I have chosen the third option?
I have decided to use an additional RAID card because for the Marvell SATA controller RAID I have see a lot of discussion about weird issues (ex: RAID no more recognized after a poweroff and power on).
Plus I have tested it and it didn’t recognized a failure on one of the HDD and the Marvell Utility on Linux is a crap so I have discarded it.
I have also discarded Linux software RAID for performance issue, sometimes it use a lot of I/O.
On the Microserver there are only two core (It’s an AMD Opteron X3216 APU) so the server will became busy only for handle read/write operations.
So in the end I have chosen a Dell PERC H200 RAID card (it’s an LSI 9240-8i PCI SAS/SATA) because it’s a good and also cheapest RAID on the market.
Plus it works (only in BIOS mode) and fit perfectly on the Microserver (only the connector for the discs is not easy to fit).
By taking a look on various forums (in particular this on homeservershow.com) they suggest the LSI 92XX series.
Firmware upgrade
Now let’s stop talking and let’s start with the facts.
The PERC H200 card that I’ve bought come with a very old firmware version (2010 I think it’s the first release) and it doesn’t support HDD major than 2 TB, only the recent firmware will support them.
On the web there are lot of tutorial for convert this card from Dell brand to original LSI firmware. (LSI9211-IT or LSI9211-IR here an explaination about the two modes)
Since Dell provide an official firmware we are gonna use it.
Step 1 – Get the firmware
Go on the Dell website and downlod the Linux version of the firmware for the PERC H200 (https://www.dell.com/support/home/it/it/itdhs1/drivers/driversdetails?driverid=nx9t4).
For flash the firmware LSI provide a tool called sas2flash.
Since we are gonna flash the original Dell firmware we can flash directly from Linux OS (Centos 7 in my case) without creating a bootable MSDOS USB Stick.
I have downloaded the sas2flash utility for linux from this link let’s download and extract the content from the zip
Now we are ready to flash the RAID card, go inside the firmware-upgrade folder and run this command in order to list all available LSI RAID controller on the system
[[email protected] firmware-upgrade]# ./sas2flash -listall
LSI Corporation SAS2 Flash Utility
Version 12.00.00.00 (2011.11.08)
Copyright (c) 2008-2011 LSI Corporation. All rights reserved
Adapter Selected is a LSI SAS: SAS2008(B2)
Num Ctlr FW Ver NVDATA x86-BIOS PCI Addr
----------------------------------------------------------------------------
0 SAS2008(B2) 07.15.08.00 07.00.00.19 07.11.10.00 00:03:00:00
Finished Processing Commands Successfully.
Exiting SAS2Flash.
As you can see the tool detect our card as number 0, let’s print out the detail of this card
[[email protected] firmware-upgrade]# ./sas2flash -c 0 -list
LSI Corporation SAS2 Flash Utility
Version 12.00.00.00 (2011.11.08)
Copyright (c) 2008-2011 LSI Corporation. All rights reserved
Adapter Selected is a LSI SAS: SAS2008(B2)
Controller Number : 0
Controller : SAS2008(B2)
PCI Address : 00:03:00:00
SAS Address : 5782bcb-0-5480-5300
NVDATA Version (Default) : 07.00.00.19
NVDATA Version (Persistent) : 07.00.00.19
Firmware Product ID : 0x2713
Firmware Version : 07.15.08.00
NVDATA Vendor : Dell
NVDATA Product ID : H200A
BIOS Version : 07.11.10.00
UEFI BSD Version : 07.00.01.00
FCODE Version : N/A
Board Name : PERC H200A
Board Assembly : N/A
Board Tracer Number : N/A
Finished Processing Commands Successfully.
Exiting SAS2Flash.
In my case the output is alredy after a firmware flash but before do the flash note down the following data: NVDATA, Firmware Version and BIOS Version.
Run now the following command for start the firmware flash. We flash the firmware (-f parameter and the boot rom – b parameter):
Flash command
[[email protected] firmware-upgrade]# ./sas2flash -o -f H200A.FW -b mptsas2.rom
LSI Corporation SAS2 Flash Utility
Version 12.00.00.00 (2011.11.08)
Copyright (c) 2008-2011 LSI Corporation. All rights reserved
Advanced Mode Set
Adapter Selected is a LSI SAS: SAS2008(B2)
Executing Operation: Flash Firmware Image
Firmware Image has a Valid Checksum.
Firmware Image compatible with Controller.
Valid NVDATA Image found.
NVDATA Device ID and Chip Revision match verified.
NVDATA Versions Compatible.
Valid Initialization Image verified.
Valid BootLoader Image verified.
Beginning Firmware Download...
Firmware Download Successful.
Verifying Download...
Firmware Flash Successful.
Resetting Adapter...
Adapter Successfully Reset.
Executing Operation: Flash BIOS Image
Validating BIOS Image...
BIOS Header Signature is Valid
BIOS Image has a Valid Checksum.
BIOS PCI Structure Signature Valid.
BIOS Image Compatible with the SAS Controller.
Attempting to Flash BIOS Image...
Verifying Download...
Flash BIOS Image Successful.
Updated BIOS Version in BIOS Page 3.
Finished Processing Commands Successfully.
Exiting SAS2Flash.
That’s it! If the flash gone ok you can reboot the system and enjoy the new firmware for disks > 2TB
Step 4 – RAID tools and smartctl (optional)
For this RAID card you cannot use MegaRAID tools. You need for the Fusion-MPT SAS-2 cards a tool called sas2ircu.
This tool on Centos 7 is provided by nux.ro you can download and install it with these commands:
Now you can check the RAID status with this command:
View RAID Status
[[email protected] ~]# sas2ircu 0 DISPLAY
LSI Corporation SAS2 IR Configuration Utility.
Version 15.00.00.00 (2012.11.08)
Copyright (c) 2009-2012 LSI Corporation. All rights reserved.
Read configuration has been initiated for controller 0
------------------------------------------------------------------------
Controller information
------------------------------------------------------------------------
Controller type : SAS2008
BIOS version : 7.11.10.00
Firmware version : 7.15.08.00
Channel description : 1 Serial Attached SCSI
Initiator ID : 0
Maximum physical devices : 39
Concurrent commands supported : 2607
Slot : 1
Segment : 0
Bus : 3
Device : 0
Function : 0
RAID Support : Yes
------------------------------------------------------------------------
IR Volume information
------------------------------------------------------------------------
IR volume 1
Volume ID : 79
Status of volume : Okay (OKY)
Volume wwid : 0926a6d5d71ba999
RAID level : RAID1
Size (in MB) : 2861056
Physical hard disks :
PHY[0] Enclosure#/Slot# : 1:0
PHY[1] Enclosure#/Slot# : 1:1
------------------------------------------------------------------------
Physical device information
------------------------------------------------------------------------
Initiator at ID #0
Device is a Hard disk
Enclosure # : 1
Slot # : 0
SAS Address : 4433221-1-0700-0000
State : Optimal (OPT)
Size (in MB)/(in sectors) : 2861588/5860533167
Manufacturer : ATA
Model Number : WDC WD30EFRX-68N
Firmware Revision : 0A82
Serial No : WDW
GUID : 50014ee2ba25624c
Protocol : SATA
Drive Type : SATA_HDD
Device is a Hard disk
Enclosure # : 1
Slot # : 1
SAS Address : 4433221-1-0600-0000
State : Optimal (OPT)
Size (in MB)/(in sectors) : 2861588/5860533167
Manufacturer : ATA
Model Number : WDC WD30EFRX-68N
Firmware Revision : 0A82
Serial No : WDW
GUID : 50014ee264d045a4
Protocol : SATA
Drive Type : SATA_HDD
Device is a Hard disk
Enclosure # : 1
Slot # : 2
SAS Address : 4433221-1-0500-0000
State : Ready (RDY)
Size (in MB)/(in sectors) : 2861588/5860533167
Manufacturer : ATA
Model Number : WDC WD30EFRX-68E
Firmware Revision : 0A82
Serial No : WDW
GUID : 50014ee2bb84764b
Protocol : SATA
Drive Type : SATA_HDD
Device is a Hard disk
Enclosure # : 1
Slot # : 3
SAS Address : 4433221-1-0400-0000
State : Ready (RDY)
Size (in MB)/(in sectors) : 2861588/5860533167
Manufacturer : ATA
Model Number : WDC WD30EFRX-68E
Firmware Revision : 0A82
Serial No : WDW
GUID : 50014ee20fc049ff
Protocol : SATA
Drive Type : SATA_HDD
------------------------------------------------------------------------
Enclosure information
------------------------------------------------------------------------
Enclosure# : 1
Logical ID : 5782bcb0:54805300
Numslots : 8
StartSlot : 0
------------------------------------------------------------------------
SAS2IRCU: Command DISPLAY Completed Successfully.
SAS2IRCU: Utility Completed Successfully.
[[email protected] ~]#
If you need or need to run smartmontools on each disk normally you cannot with a RAID card but there is a trick.
You just need only to load the sg kernel module (Linux SCSI Generic driver) and then you where able to use smartctl.
[[email protected] ~]# modprobe sg
[[email protected] ~]# smartctl -a /dev/sg2
smartctl 6.5 2016-05-07 r4318 [x86_64-linux-3.10.0-957.27.2.el7.x86_64] (local build)
Copyright (C) 2002-16, Bruce Allen, Christian Franke, www.smartmontools.org
=== START OF INFORMATION SECTION ===
Model Family: Western Digital Red
Device Model: WDC WD30EFRX-68N32N0
Serial Number: WD-WCC
LU WWN Device Id: 5 0014ee 2ba25624c
Firmware Version: 82.00A82
User Capacity: 3,000,592,982,016 bytes [3.00 TB]
Sector Sizes: 512 bytes logical, 4096 bytes physical
Rotation Rate: 5400 rpm
Form Factor: 3.5 inches
Device is: In smartctl database [for details use: -P show]
ATA Version is: ACS-3 T13/2161-D revision 5
SATA Version is: SATA 3.1, 6.0 Gb/s (current: 6.0 Gb/s)
Local Time is: Wed Aug 14 15:31:56 2019 CEST
SMART support is: Available - device has SMART capability.
SMART support is: Enabled
To always load the module at boot you need to create a file under /etc/modules-load.d/ folder for ex. raid-smart.conf and inside the file write sg
– iproute2
– act_mirred and act_connmark kernel support
– lradaelli85 QoS scripts (https://github.com/lradaelli85/tc-QOS)
– (optional) nDPI for L7 classification
Features
– Handle Download traffic (i.e traffic coming from WAN)
– Handle Upload traffic (i.e traffic to WAN)
– (optional) Classify L7 traffic
– (optional) Slowdown (set a low priority) those connections that go beyond a fixed amount of traffic (i.e big download)
Introduction
The aim of this script is to guarantee (bandwidth can’t go below this value) , limit (maximum bandwidth usable) and prioritize certain kind of traffic.
It has been designed to share the same internet link between different sources.
This is done by using classes.
download/upload/guaranteed/limit/applications values present in qos.cfg have been used only as reference
This script has been designed to use three different kind of classes:
– Bulk traffic
This class has a low guaranteed bandwidth,medium priority and it can use all the available up/down bandwidth
All low-ports (0-1023, except some) are classified as bulk traffic.
Modify the QoS.sh file if this is not what you want
– Low priority traffic
Traffic that has to be limited (small amount of available bandwidth) with a low priority.
All high-ports (1024-65535, except some) are classified as low priority traffic.
YOUTUBE,TWITTER,FACEBOOK,DROPBOX,SPOTIFY applications if L7 is enabled.
Modify the QoS.sh and qos.cfg files if this is not what you want
– High priority traffic
Traffic that has to be prioritized.
This class has an high guaranteed bandwidth, high priority and it can use all the available up/down bandwidth
HTTP(s),SSH,DNS,VOIP,IPsec,OpenVPN are classified as high priority traffic.
STUN,RTP,H323,HANGOUT,SKYPE,OFFICE 365 applications if L7 is enabled
Modify the QoS.sh and qos.cfg files if this is not what you want
When a class requests less than the amount assigned, the remaining (excess) bandwidth is distributed to other classes which request service.
Classes with higher priority are offered excess bandwidth first. But rules about guaranteed rate (can’t go below this value ) and ceil (maximum bandwidth usable by a class) are still met.
This script automatically enable forwarding and source NAT
To learn more about HTB take a look to the below links (thanks to the Author)
Edit the qos.cfg file and set the variables accordingly.
For each variable there is a short explanation
– disable the slowdown feature set the `ENABLE_SLOWDOWN` value to `off`
– In order to disable the L7 classification set the `ENABLE_L7` value to `off`
To check supported applications run `iptables -m ndpi –help`
Usually the `iptables mark` parameters does not need to be changed,do it only if you know what are you doing
**NO FILTER POLICY HAVE BEEN ADDED**
The qos_class_mapping.cfg file contains a mapping (human readable) between the class ID and the class Description.
If you will change the `iptables mark` values in the qos.cfg remember to update the qos_class_mapping.cfg accordingly.
To run the script issue the below command
./QoS.sh start
If you want to have some statistics about traffic QoS classes run
I decided to classify as bulk traffic all low ports traffic (0-1023) explicitly (except some tcp/udp ports.See Introduction).
Actually,you can also classify as bulk all the not-classified traffic (i.e no high/low prio traffic) uncommenting
the `#default $DOWN_BULK_MARK` line in QoS.sh file.
Notes
if you uncomment the `#default $DOWN_BULK_MARK` in QoS.sh,the locally-generated-traffic will be classified as bulk by default ,since this script classify only traffic that will be routed to WAN interface.
Credits
Credits to lradaelli85 for the scripts and explaination
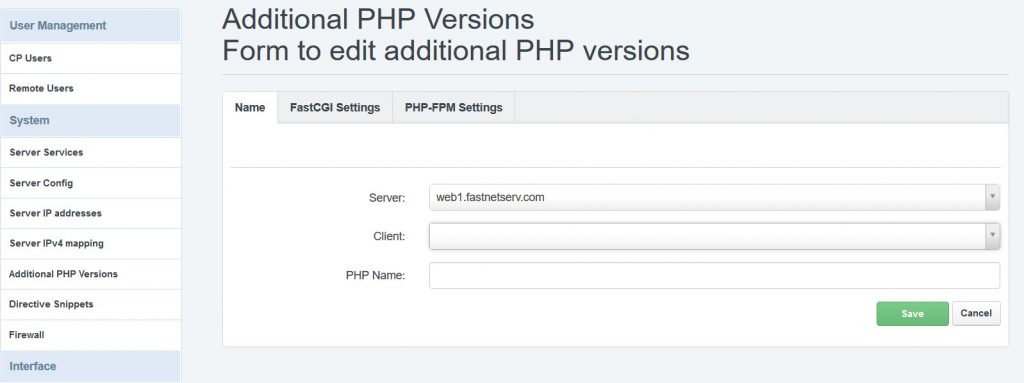
Ubuntu 14.04 is shipped with PHP 5.5.9 as default PHP version. Since most of CMS now want a most recent version of PHP we gonna explain how-to install a most recent version of PHP.
I’ll explain how to compile and then use PHP 7.2.6 on Ubuntu 14.04 LTS with ISPConfig.
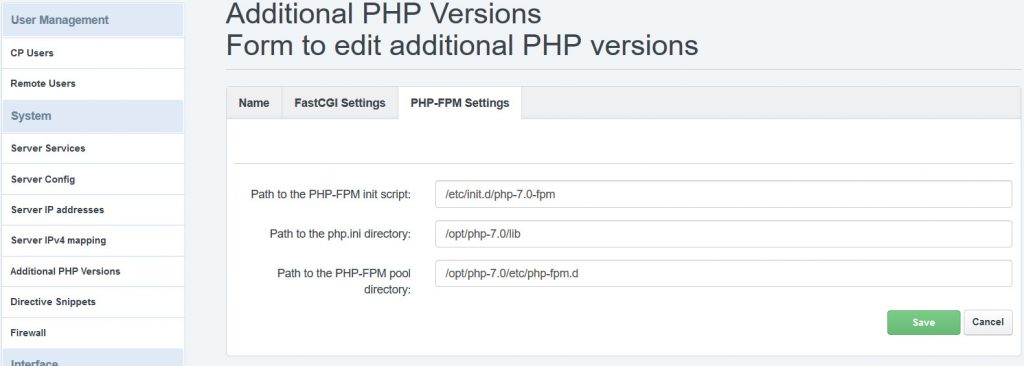
We will see also how-to configure ISPConfig for using the new PHP engine.
Let’s start by creating the necessary folders, downloading the latest PHP 7.2 version from php.net website and extract it:
mkdir -p /opt/php-7.2
mkdir /usr/local/src/php7-build
cd /usr/local/src/php7-build
wget http://de2.php.net/get/php-7.2.6.tar.bz2/from/this/mirror -O php-7.2.6.tar.bz2
tar jxf php-7.2.6.tar.bz2
cd php-7.2.6
Before starting we need to Install the necessary libraries and building tools for compile our PHP version.
If you are not logged-in as root, run the commands with sudo in front of each commands:
After the installation of the required build-tools, we can now go ahead and start configuring & enabling the PHP modules that we want to use, before compiling PHP:
Now we can start compiling PHP and install the new compiled module, our new version of PHP will be installed under /opt/php-7.2/ in order to do not interfere with other system stuff, on SSH now type:
make
make install
The compile will take a while (it vary from the server hardware). Once the compile end without errors we can proceed with the next steps
Copy php.ini, php-fpm.conf and www.conf configuration files under /opt/php-7.2/
After copying the files we now proceed by adjust the php-fpm.conf file.
I have used the editor vim but you can use you preferred editor like for ex. nano
vim /opt/php-7.2/etc/php-fpm.conf
Inside the configuration file comment out the pid section, I have changed the pid filename in order to have the possibility of compile and use multiple PHP version at the same time, if you leave it as default and then compile other version of PHP and use the same pid filename, you will incure in some issues. After edit the file, save it and proceed with the next step.
[...]
pid = run/php-7.2-fpm.pid
[...]
We need now to change also www.conf file in order to have php-fpm listening on different port (on the default port 9000 and on port 8999 I have already another php-fpm version running). I have chosen the port 8998
vim /opt/php-7.2/etc/php-fpm.d/www.conf
[...]
listen = 127.0.0.1:8998
[...]
We are almost done now, there are only few steps to be done, first of all the init.d file, otherwise our php-fpm will never start automatically. Let’s create now the init.d file:
vim /etc/init.d/php-7.2-fpm
#! /bin/sh
### BEGIN INIT INFO
# Provides: php-7.2-fpm
# Required-Start: $all
# Required-Stop: $all
# Default-Start: 2 3 4 5
# Default-Stop: 0 1 6
# Short-Description: starts php-7.2-fpm
# Description: starts the PHP FastCGI Process Manager daemon
### END INIT INFO
php_fpm_BIN=/opt/php-7.2/sbin/php-fpm
php_fpm_CONF=/opt/php-7.2/etc/php-fpm.conf
php_fpm_PID=/opt/php-7.2/var/run/php-7.2-fpm.pid
php_opts="--fpm-config $php_fpm_CONF"
wait_for_pid () {
try=0
while test $try -lt 35 ; do
case "$1" in
'created')
if [ -f "$2" ] ; then
try=''
break
fi
;;
'removed')
if [ ! -f "$2" ] ; then
try=''
break
fi
;;
esac
echo -n .
try=`expr $try + 1`
sleep 1
done
}
case "$1" in
start)
echo -n "Starting php-fpm "
$php_fpm_BIN $php_opts
if [ "$?" != 0 ] ; then
echo " failed"
exit 1
fi
wait_for_pid created $php_fpm_PID
if [ -n "$try" ] ; then
echo " failed"
exit 1
else
echo " done"
fi
;;
stop)
echo -n "Gracefully shutting down php-fpm "
if [ ! -r $php_fpm_PID ] ; then
echo "warning, no pid file found - php-fpm is not running ?"
exit 1
fi
kill -QUIT `cat $php_fpm_PID`
wait_for_pid removed $php_fpm_PID
if [ -n "$try" ] ; then
echo " failed. Use force-exit"
exit 1
else
echo " done"
echo " done"
fi
;;
force-quit)
echo -n "Terminating php-fpm "
if [ ! -r $php_fpm_PID ] ; then
echo "warning, no pid file found - php-fpm is not running ?"
exit 1
fi
kill -TERM `cat $php_fpm_PID`
wait_for_pid removed $php_fpm_PID
if [ -n "$try" ] ; then
echo " failed"
exit 1
else
echo " done"
fi
;;
restart)
$0 stop
$0 start
;;
reload)
echo -n "Reload service php-fpm "
if [ ! -r $php_fpm_PID ] ; then
echo "warning, no pid file found - php-fpm is not running ?"
exit 1
fi
kill -USR2 `cat $php_fpm_PID`
echo " done"
;;
*)
echo "Usage: $0 {start|stop|force-quit|restart|reload}"
exit 1
;;
esac
Change the permission and set the default run levels
Ubuntu 14.04 is shipped with PHP 5.5.9 as default PHP version. Since most of CMS now want a most recent version of PHP we gonna explain how-to install a most recent version of PHP.
I’ll explain how to compile and then use PHP 7.0.30 on Ubuntu 14.04 LTS with ISPConfig.
We will see also how-to configure ISPConfig for using the new PHP engine.
Let’s start by creating the necessary folders, downloading the latest PHP 7.0 version from php.net website and extract it:
mkdir -p /opt/php-7.0
mkdir /usr/local/src/php7-build
cd /usr/local/src/php7-build
wget http://de2.php.net/get/php-7.0.30.tar.bz2/from/this/mirror -O php-7.0.30.tar.bz2
tar jxf php-7.0.30.tar.bz2
cd php-7.0.30
Before starting we need to Install the necessary libraries and building tools for compile our PHP version.
If you are not logged-in as root, run the commands with sudo in front of each commands:
After the installation of the required build-tools, we can now go ahead and start configuring & enabling the PHP modules that we want to use, before compiling PHP:
Now we can start compiling PHP and install the new compiled module, our new version of PHP will be installed under /opt/php-7.0/ in order to do not interfere with other system stuff, on SSH now type:
make
make install
The compile will take a while (it vary from the server hardware). Once the compile end without errors we can proceed with the next steps
Copy php.ini, php-fpm.conf and www.conf configuration files under /opt/php-7.0/
After copying the files we now proceed by adjust the php-fpm.conf file.
I have used the editor vim but you can use you preferred editor like for ex. nano
vim /opt/php-7.0/etc/php-fpm.conf
Inside the configuration file comment out the pid section, I have changed the pid filename in order to have the possibility of compile and use multiple PHP version at the same time, if you leave it as default and then compile other version of PHP and use the same pid filename, you will incure in some issues. After edit the file, save it and proceed with the next step.
[...]
pid = run/php-7.0-fpm.pid
[...]
We need now to change also www.conf file in order to have php-fpm listening on different port (on the default port 9000 and on port 8999 I have already another php-fpm version running). I have chosen the port 8998
vim /opt/php-7.0/etc/php-fpm.d/www.conf
[...]
listen = 127.0.0.1:8998
[...]
We are almost done now, there are only few steps to be done, first of all the init.d file, otherwise our php-fpm will never start automatically. Let’s create now the init.d file:
vim /etc/init.d/php-7.0-fpm
#! /bin/sh
### BEGIN INIT INFO
# Provides: php-7.0-fpm
# Required-Start: $all
# Required-Stop: $all
# Default-Start: 2 3 4 5
# Default-Stop: 0 1 6
# Short-Description: starts php-7.0-fpm
# Description: starts the PHP FastCGI Process Manager daemon
### END INIT INFO
php_fpm_BIN=/opt/php-7.0/sbin/php-fpm
php_fpm_CONF=/opt/php-7.0/etc/php-fpm.conf
php_fpm_PID=/opt/php-7.0/var/run/php-7.0-fpm.pid
php_opts="--fpm-config $php_fpm_CONF"
wait_for_pid () {
try=0
while test $try -lt 35 ; do
case "$1" in
'created')
if [ -f "$2" ] ; then
try=''
break
fi
;;
'removed')
if [ ! -f "$2" ] ; then
try=''
break
fi
;;
esac
echo -n .
try=`expr $try + 1`
sleep 1
done
}
case "$1" in
start)
echo -n "Starting php-fpm "
$php_fpm_BIN $php_opts
if [ "$?" != 0 ] ; then
echo " failed"
exit 1
fi
wait_for_pid created $php_fpm_PID
if [ -n "$try" ] ; then
echo " failed"
exit 1
else
echo " done"
fi
;;
stop)
echo -n "Gracefully shutting down php-fpm "
if [ ! -r $php_fpm_PID ] ; then
echo "warning, no pid file found - php-fpm is not running ?"
exit 1
fi
kill -QUIT `cat $php_fpm_PID`
wait_for_pid removed $php_fpm_PID
if [ -n "$try" ] ; then
echo " failed. Use force-exit"
exit 1
else
echo " done"
echo " done"
fi
;;
force-quit)
echo -n "Terminating php-fpm "
if [ ! -r $php_fpm_PID ] ; then
echo "warning, no pid file found - php-fpm is not running ?"
exit 1
fi
kill -TERM `cat $php_fpm_PID`
wait_for_pid removed $php_fpm_PID
if [ -n "$try" ] ; then
echo " failed"
exit 1
else
echo " done"
fi
;;
restart)
$0 stop
$0 start
;;
reload)
echo -n "Reload service php-fpm "
if [ ! -r $php_fpm_PID ] ; then
echo "warning, no pid file found - php-fpm is not running ?"
exit 1
fi
kill -USR2 `cat $php_fpm_PID`
echo " done"
;;
*)
echo "Usage: $0 {start|stop|force-quit|restart|reload}"
exit 1
;;
esac
Change the permission and set the default run levels
We proceed now to configure the DHCP Server in order to release IPs to our clients through Wi-Fi (wlan0).
Let’s start by configuring the DHCP subnet, IP range and DNS Server to push to the clients
/etc/dhcp/dhcpd.conf
#
# Configuration file for ISC dhcpd for Debian
#
#
# The ddns-updates-style parameter controls whether or not the server will
# attempt to do a DNS update when a lease is confirmed. We default to the
# behavior of the version 2 packages ('none', since DHCP v2 didn't
# have support for DDNS.)
ddns-update-style none;
default-lease-time 600;
max-lease-time 7200;
# If this DHCP server is the official DHCP server for the local
# network, the authoritative directive should be uncommented.
authoritative;
# Use this to send dhcp log messages to a different log file (you also
# have to hack syslog.conf to complete the redirection).
log-facility local7;
# Internal subnet.
subnet 10.5.5.0
netmask 255.255.255.0 {
range 10.5.5.26 10.5.5.50;
option domain-name-servers 8.8.8.8, 8.8.4.4;
option domain-name "local-network";
option routers 10.5.5.1;
option broadcast-address 10.5.5.255;
default-lease-time 600;
max-lease-time 7200;
}
After configuring the DHCP subnet we should specify on which interface/interfaces the DHCP Server should listen, for doing this we edit the following file and insert the interface in the “INTERFACES” section:
/etc/default/isc-dhcp-server
# Defaults for isc-dhcp-server initscript
# sourced by /etc/init.d/isc-dhcp-server
# installed at /etc/default/isc-dhcp-server by the maintainer scripts
#
# This is a POSIX shell fragment
#
# Path to dhcpd's config file (default: /etc/dhcp/dhcpd.conf).
#DHCPD_CONF=/etc/dhcp/dhcpd.conf
# Path to dhcpd's PID file (default: /var/run/dhcpd.pid).
#DHCPD_PID=/var/run/dhcpd.pid
# Additional options to start dhcpd with.
# Don't use options -cf or -pf here; use DHCPD_CONF/ DHCPD_PID instead
#OPTIONS=""
# On what interfaces should the DHCP server (dhcpd) serve DHCP requests?
# Separate multiple interfaces with spaces, e.g. "eth0 eth1".
INTERFACES="wlan0"
Configure Wi-Fi AP
We configure now hostapd in order to setup a Wi-Fi network for the clients like Smartphone, Laptop, Tablets, etc..
If doesn’t already exist create a file under “/etc/hostapd/hostapd.conf”
touch /etc/hostapd/hostapd.conf
Then inside the file put the following configuration and change the field ssid (replace <your-ssid-here>) and wpa_passphrase (replace <password-here>) with a Wi-Fi name to show to your devices and the password for access to the Wi-Fi
### Wireless network interface ###
interface=wlan0
### Driver ###
driver=nl80211
### Network name SSID ###
ssid=<your-ssid-here>
### Set frequency to 2.4 Ghz ###
hw_mode=g
### Channel number ###
channel=4
### Enable Wi-Fi N ###
ieee80211n=1
### Enable WMM ###
wmm_enabled=1
### Enable 40 Mhz channels ###
ht_capab=[HT40][SHORT-GI-20][DSSS_CCK-40]
### Allow all MAC Address ###
macaddr_acl=0
### Use WPA Auth ###
auth_algs=1
### Require clients to know the network name ###
ignore_broadcast_ssid=0
### Use WPA2 ###
wpa=2
### Enable Pre-Shared Key ###
wpa_key_mgmt=WPA-PSK
### Network key ###
wpa_passphrase=<password-here>
### Use AES ###
rsn_pairwise=CCMP
Now we should tell to the which configuration file the init script should use, in order to do this we need to edit the file “/etc/default/hostapd” and comment out the parameter “DAEMON_CONF=” and fill it with the path to the previously created hostapd configuration file. At the end the file should be like that:
# Defaults for hostapd initscript
#
# See /usr/share/doc/hostapd/README.Debian for information about alternative
# methods of managing hostapd.
#
# Uncomment and set DAEMON_CONF to the absolute path of a hostapd configuration
# file and hostapd will be started during system boot. An example configuration
# file can be found at /usr/share/doc/hostapd/examples/hostapd.conf.gz
#
DAEMON_CONF="/etc/hostapd/hostapd.conf"
# Additional daemon options to be appended to hostapd command:-
# -d show more debug messages (-dd for even more)
# -K include key data in debug messages
# -t include timestamps in some debug messages
#
# Note that -B (daemon mode) and -P (pidfile) options are automatically
# configured by the init.d script and must not be added to DAEMON_OPTS.
#
#DAEMON_OPTS=""
Configure the network interface and Firewall (iptables) rules
We configure now the interface wlan0 in the file “/etc/network/interfaces” in order to disable the automatic configuration through wpa_supplicant and assign a static IP to the wlan0 interface and make it as a default gateway for the clients.
Comment the section “iface wlan0 inet manual” and “wpa-conf /etc/wpa_supplicant/wpa_supplicant.conf”.
# interfaces(5) file used by ifup(8) and ifdown(8)
# Please note that this file is written to be used with dhcpcd
# For static IP, consult /etc/dhcpcd.conf and 'man dhcpcd.conf'
# Include files from /etc/network/interfaces.d:
source-directory /etc/network/interfaces.d
auto lo
iface lo inet loopback
iface eth0 inet manual
allow-hotplug wlan0
#iface wlan0 inet manual
# wpa-conf /etc/wpa_supplicant/wpa_supplicant.conf
iface wlan0 inet static
address 10.5.5.1
netmask 255.255.255.0
network 10.5.5.0
broadcast 10.5.5.255
allow-hotplug wlan1
iface wlan1 inet manual
wpa-conf /etc/wpa_supplicant/wpa_supplicant.conf
We need now to setup our Raspberry Pi as a “Router” so we should now enable the packets forwarding into the kernel with:
sudo echo 1 > /proc/sys/net/ipv4/ip_forward
But this will only enable temporary the packet forwarding so in order to make it permanent we should edit the file “/etc/sysctl.conf” and add (or comment out if exist)
# Uncomment the next line to enable packet forwarding for IPv4
net.ipv4.ip_forward=1
The configuration is almost finished, we need only to setup the iptables rules
iptables -t nat -A POSTROUTING -o usb0 -j MASQUERADE
iptables -A FORWARD -i usb0 -o wlan0 -m state --state RELATED,ESTABLISHED -j ACCEPT
iptables -A FORWARD -i wlan0 -o usb0 -m state --state NEW,RELATED,ESTABLISHED -j ACCEPT
iptables -A FORWARD -j DROP
Save the current iptables rule with
iptables-save > /etc/iptables.ipv4.nat
We configure the rule to be loaded at boot by edit the file “/etc/rc.local” and add at the end of the file (before the “exit 0) the following lines:
iptables-restore < /etc/iptables.ipv4.nat
Why “usb0” interface in the iptables rules?
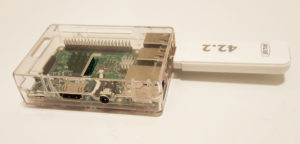
Probably you are asking why I’ve chosen the usb0 interface in the iptables rules instead of ppp0. I’ve chosen usb0 because my 3G key (a ZTE MF730) is switched by the usb-modeswitch project as an USB Ethernet interface (this happens also for some Huawei 3G/4G key).
Starting the services
The configuration now is ended so let’s start the services!
First of all restart the networking in order to apply the modification